
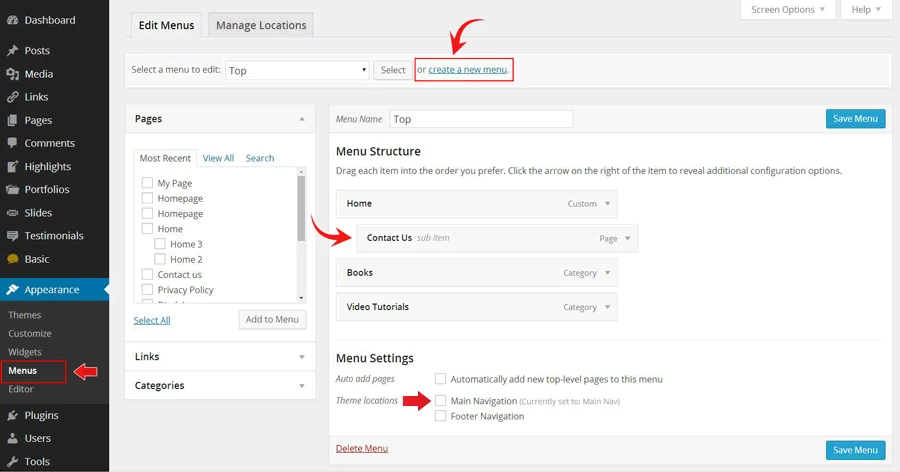
To create a custom navigation menu:
- Go to Appearance > Menu
- Click on "create a new menu" to create a new menu (eg. Main Menu).
- Add the menu items from the left panels
- To create dropdown menu: drag the menu item toward the right (the item(s) will be indented)
- When you are done adding the menu items, click "Save Menu"
- To assign menu locations:
- Scroll down to the bottom where it says "Theme locations" and tick the menu location checkbox
- Main Navigation = main menu in the header
- Footer Navigation = footer menu in the footer (note: some themes might not have Footer Navigation)
Tips: the custom menu can also be used with the widget (go to Appearance > Widgets and drop in the Custom Menu widget). You may create additional menus by clicking the "create a new menu" link.
Custom Link Buttons
The "Custom Links" panel allows you to add menu link to external URL. For example you can create a link to Themify by entering:
- URL = https://themify.me
- Label = Themify
Empty/Fake Link
If you want to create an empty link (a link that doesn't go anywhere), enter:
- URL = #
- Label = Link Text
Removing the Default Main Navigation
To remove the default main navigation:
- Create a new menu (eg. Blank Menu)
- Do not add any link in the Blank Menu (ie. leave it empty)
- Save the menu and assign it as the Main Navigation in the Theme Locations panel
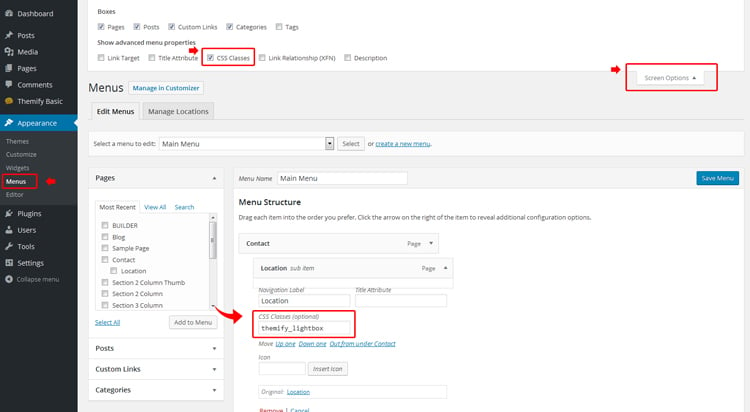
Open Link in Lightbox
To open the menu links in lightbox, add 'themify_lightbox' in the CSS Classes field as shown in the screenshot below. If the CSS Classes field is not visible: click "Screen Options" and then check "CSS Classes.
Custom Menu Widget
To display custom menus in sidebar widgets:
- First create the menu
- Then go to Appearance > Widgets, drop in a Custom Menu widget to the widget panel
- Select the menu and save the widget panel