
To upload files, you can use WordPress's online interface, the Dashboard.
To Upload a File in a Post
- 1) On the Dashboard menu, click Posts, and then click Add New to display the "Add New Post" page.
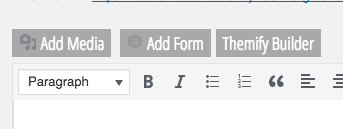
- 2) Click Add Media above the editor, either drop the file(s) or select from your computer.
- 3) In the dialog box, select the file you want to upload.
To select multiple files, hold down the SHIFT key (for PC users) or the COMMAND key (for Mac users). - 4) Click Open.
- 5) When your file uploads, a field appears. At the bottom of the field, click the Insert into Post button.
To Upload a File in a Page
- 1) On the Dashboard menu, click Pages, and then click Add New to display "Add New Page."
- 2) Click Add Media above the editor, either drop the file(s) or select from your computer.
- 3) In the dialog box, select the file you want to upload.
To select multiple files, hold down the SHIFT key (for PC users) or the COMMAND key (for Mac users). - 4) Click the Open button.
- 5) When the upload is complete, a field with your file appears. At the bottom of the field, click the Insert into Post button.
To Upload a File for Later Use (Using Media Library)
- 1) On the Dashboard menu, click Media and then click Add New to display the "Upload New Media" page.
- 2) Click the Select Files button to open a dialog box.
- 3) In the dialog box, select the file you want to upload.
To select multiple files, hold down the SHIFT key (for PC users) or the COMMAND key (for Mac users). - 4) Click the Open button.
- 5) When the upload is complete, a field with your file details appears. Below the field, click Save all changes.
Original post: https://codex.wordpress.org/Uploading_Files